Timeline Sets
Filtered timelines can be saved as sets. Set is a selection of timelines according to configured rules. Created sets are displayed in the Sets window. To open it click the corresponding block at the top center pane.
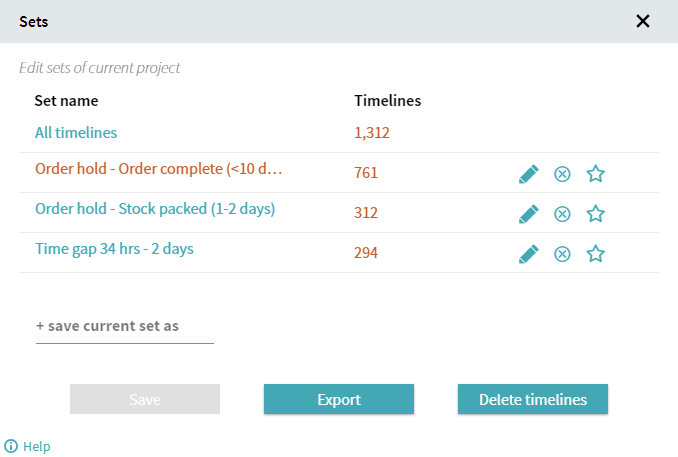
All timelines in the project form a default set that cannot be changed.
To manage user-defined sets:
- Click
 to rename set.
 - Click
 to remove filters that create a set.
Important. This action deletes only set filters and leaves the project data untouched. - Click
 to mark the preferred sets.
For details on additional interaction with sets, see Set actions.
How to create Set
- Configure filters to form a base for a set. Created filters are shown in the Current block.
For details, see How to Create Filters. - Save a set. Use one of the following options:
- Open the Filters window by clicking Current at the top pane. Click Save as new set, type the name, and click OK.
Note. You may want to overwrite the selected set with the new data. In this case, click Save set. - Open the Sets window by clicking the selected set name at the top pane. In the field +save current as set, type the name of the set and press Enter.
Dynamic sets
In most cases, the number of timelines for a set is constant and automatically updated when you upload the new data, as you may get new timelines that meet set rules.
In Timeline, a set can also be dynamic. These are sets that are configured using changeable metrics or relate to unfixed time (conditions that use time parameters like a current or previous week/month/year). For example, these are Cost and Business duration metrics, which are configured and updated by a user. When a user makes changes to related configuration tools, the corresponding metrics update. That means the sets that are filtered by cost and business duration values are recalculated.
Set actions
In the Sets window, the following actions are available:
- Delete timelines belonging to a set
You can delete timelines from the project according to the conditions of the chosen set. Select the set, open the Sets window, and click Delete timelines. The program prompts you to confirm this action. Click Delete to start the process.
The same timelines can be included in different sets. If you delete timelines, they will be respectively removed from all sets that they belong to. To update affected sets, click Recalculate Sets in the Sets window.
Important. You cannot undo the deletion of timelines.
- Update sets
In the number of timelines column, you may see the Unknown value. This refers to the sets that are dynamic. For example, if you create a filter based on the business duration metric and then change the Calendar settings, the set based on this filter can now contain another number of timelines. Click Recalculate Sets in the Sets window to update affected sets.
- Export timelines belonging to a set
It can be useful to export timelines referred to a certain set and upload them into the new project. For example, it helps while working with large datasets, when not all features are available. Export timelines connected with the set and create a new project with them to reduce the amount of processed data.
For more details about working with large datasets, see Working with Process Projects in Large Data Mode.
To export timelines related to a set:
- Select the set, open the Sets window, and click Export.
- Configure export conditions:
- Export target
Select the type of file: Spreadsheet or Native. Choose Native to get a CSV file without formatting. - Export format
Select CSV or ZIP. - Export type
Select One row per event or One row per timeline.
This setting affects the exported content. In case you plan to use this file as a data source for a new project, select One row per event. - File name
Enter a file name. - Click Export to save the file with timelines.
9/5/2024 4:23:54 PM