Connecting to Alteryx as a Data Source
To upload data from the Alteryx into ABBYY Timeline, you need to use ABBYY Timeline Connector for Alteryx.
Usage scenario
The ABBYY Timeline Connector for Alteryx can typically be used in the following scenario:
- In ABBYY Timeline, the user creates a project that will process data received from Alteryx Designer.
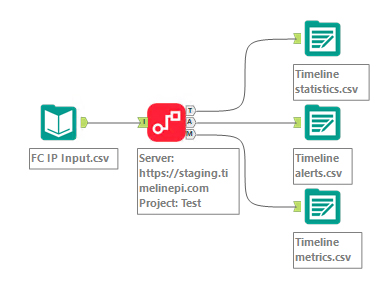
- In Alteryx Designer, the user creates a workflow. The most basic workflow will include the following steps:
- The connector accepts the input data set arranged as a table. The most common mechanism to load your data is via a CSV file.
- The connector sends the data to the ABBYY Timeline project.
- The connector receives the processing results in tabular form.
- Output data can be saved into files.

Basic steps
- Download, install and configure ABBYY Timeline Connector for Alteryx.
The connector for Alteryx is intended for integrating Alteryx and ABBYY Timeline. The connector allows you to submit data from Alteryx to ABBYY Timeline.
Please contact your ABBYY representative or ABBYY Timeline support via this page and obtain the link to download the newest version of the ABBYY Timeline Connector for Alteryx. - Create a project in ABBYY Timeline that will process data received from the Alteryx.
For detailed instructions on configuring Alteryx as data source, see 'Configuring ABBYY Timeline Project' below.
Configuring ABBYY Timeline Project
- Create an ABBYY Timeline project.
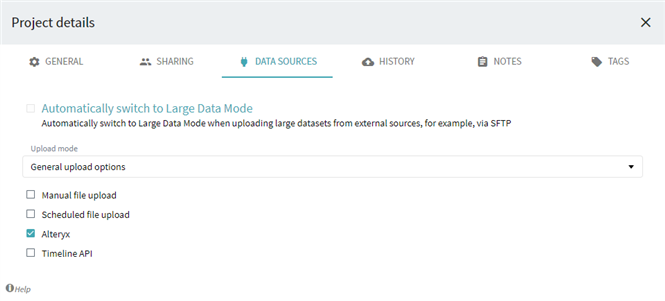
- Click your project name, then the Data sources tab in Project details and select Alteryx.

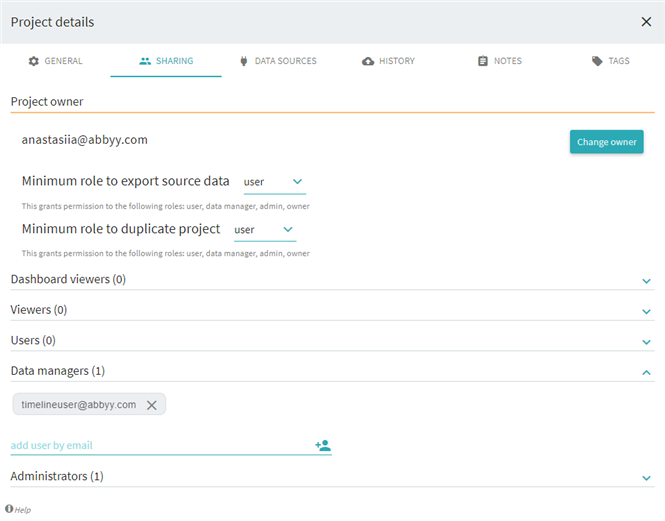
- Go to the Sharing tab and make sure that the user specified in the connector to be used when submitting data to ABBYY Timeline has the Project owner, Data manager, or Administrator role in this project.
For more information about configuring ABBYY Timeline Connector for Alteryx, see the installation guide.
- To receive alerts, create required alerts in your project (click
 > Project configuration > Alerts).
For more information, please visit 'Alerts'. - To receive metrics:
- Add required metrics to your project (click
 > Project configuration > Metrics)
For more information, please visit 'Metrics'. - Create aggregations from the added metrics (click
 > Project configuration > Aggregations).
In the open dialog box, add metrics and dimensions and click Save and recalculate button.
For more information, please visit 'Aggregations'.
05.09.2024 16:23:54