Sample 3. Step 3: Blocks
The main goal of the FlexiLayout creation is a reliable detection of the following blocks (provided they occur on an image):
- Invoice Number
- Invoice Date
- Delivery Address
- Total Quantity
- Total Amount
- Country
- Invoice Table (only the following columns: Reference, Designation, Quantity, Unit Price, Total)
Let us start to create these blocks in order to have their list during FlexiLayout creation.
- Create a block InvoiceNumber of type Text, which will correspond to the field Invoice Number.
- Create a block InvoiceDate of type Text, which will correspond to the field Invoice Date.
- Create a block DeliveryAddress of type Text, which will correspond to the field Delivery Address.
- Create a block TotalQuantity of type Text, which will correspond to the field Total Quantity.
- Create a block TotalAmount of type Text, which will correspond to the field Total Amount.
- Create a block Country of type Text, which will correspond to the field Country.
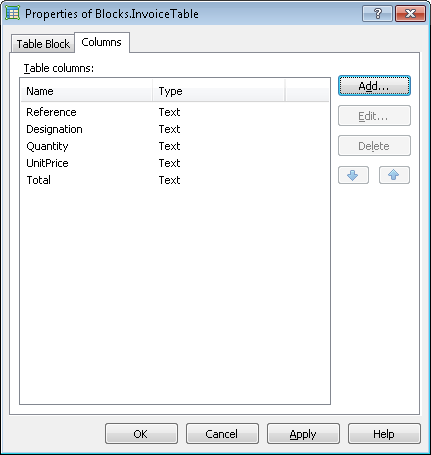
- Create a block InvoiceTable of type Table, which will correspond to the field Invoice Table. In the Properties dialog box of the block, click the Columns tab, enter the names of the columns and specify their order, which will later be used in a FlexiCapture Document Definition. Add the column names in the following order: Reference, Designation, Quantity, UnitPrice, and Total. (For more information, see Table Block)
Show me...
 Note.At this stage we only specify the type of a block and its name (and the order of columns for the Table block). We will specify the location of each block later, when all auxiliary elements have been described and debugged. It is very important that the block of type Table be created before the element of type Table which is used to look for the block, as the Table element must keep a reference to the Table block. This requirement makes Table blocks different from blocks of types Text, Barcode, Checkmark, and Picture, which can be created after modifying a FlexiLayout, when all the elements for different blocks have been created (for instance see Tutorial 1, Tutorial 2).
Now that the preparatory settings have been made, we can start to create elements.
12.04.2024 18:16:02
