Dialog Box: File Naming and Output Path
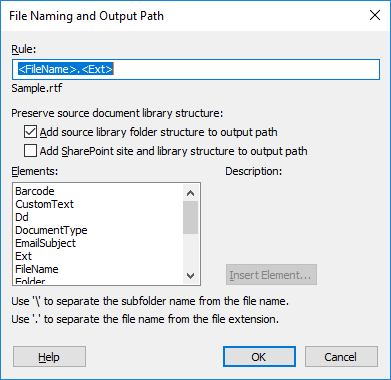
This dialog box allows you to specify a file naming and output path rule. This dialog box appears if you select Custom... in the File name drop-down list in the Output Profile Settings dialog box.
| Option name | Option description |
| Rule |
The file naming and output path rule. The rule can contain elements from the Elements list and document attributes if enclosed in angle brackets <>. Any other elements must be typed without angle brackets. Any elements without angle brackets will be passed as is. Only one backslash is allowed to specify a subfolder in the output folder.
To insert an element from the list, select it and click the Insert element button. To insert a document attribute, type the attribute name in angle brackets. If the document does not have any attributes so named, an empty string will be used instead of the attribute value.
For example,
Directly under the rule, you can see an example of how your file name will look like.
|
| Add source library folder structure to output path | The option of preserving the folder structure of the source library is available in all Document Library workflows. By default, this option is enabled in all such workflows. If this option is disabled, all output documents will be placed in the root folder of the output library. |
| Add SharePoint site and library structure to output path | Select this option to add the names of the source site and SharePoint library to the output path. |
| Elements |
The following file naming and output path elements can be used in the rule:
To the right of the list, you can see descriptions of the elements that you select. |
|
Insert Element... (button) |
Inserts a selected element into the rule. |
 Note. Names of elements are case-sensitive.
 Important! The following elements cannot be used when setting up a naming rule for saved source files: Barcode, IndexField, CustomText, DocumentType, UserDefinedEntity, EmailFileName, and EmailSubject.
See also
3/26/2024 1:49:49 PM