How to Configure Publishing Documents to a SharePoint Server
ABBYY FineReader Server 14 supports working with Microsoft Office SharePoint Server 2013, 2016 or 2019.
 Note. In order to be able to communicate with the SharePoint Server, the Server Manager and the Remote Administration Console require Microsoft .NET Framework 4.7.2 to be installed. If Microsoft .NET Framework has not been installed on the computer prior to installing ABBYY FineReader Server, the SharePoint connection library will not be registered during the installation. In this case you should install Microsoft .NET Framework 4.7.2 and then register the SharePoint connection library manually. See Manual Registration of the SharePoint Connection Library in the Administrator's Guide file.
Note. To be able to work with a SharePoint Server library, the ABBYY FineReader Server 14 Server Manager service must be run under a user account which has read/write access to the SharePoint Server library. If, during the installation, you chose to run the service under a Local System account, you should restart it under a user account (see Restarting Services under a user account).
To set up the publishing of documents to a SharePoint Server library:
- Run the Remote Administration Console under a user account which has read/write access to the SharePoint Server library.
- Create a new workflow or modify an existing one (see Creating a New Workflow). In the Output Profile Settings dialog box, select Save output file in SharePoint library.
- Enter the URL of the SharePoint Server site (e.g. http://myportal/mysite/). Click Credentials.... In the opened SharePoint Authentication dialog box enter the user name and the password used to access the portal. Remote Administration Console will try to connect with the specified web site and load a list of document libraries and folders. If connection is successful, the names of the document libraries will appear in the Library list.
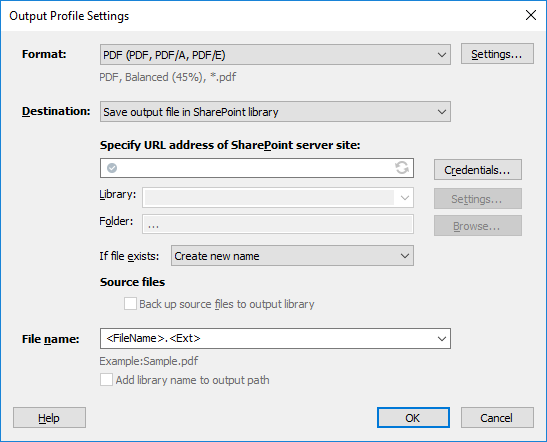
- Select the document library from the list. If you want to associate document attributes and columns of the selected type in the SharePoint site, click the Settings... button.
- Select the folder in the document library using the Browse... button, or leave the field empty to save documents in the root folder.
- Select one of the options from the If file exists list:
- Create new name,
- Overwrite file,
- Use SharePoint versioning options.
- If needed, enable the Back up source files to output library option.
- Click OK in the Output Profile Settings dialog box.
Note. If the Input folder has several subfolders containing image files, the output files will be saved in the corresponding subfolders of the Output folder in the SharePoint Server document library.
See also
26.03.2024 13:49:49