1. InputDialog Box: Workflow Properties, Tab: Input
On this tab, you can specify the input parameters to be used for importing images depending on the selected workflow type.
- Hot Folder
More info
- Document Library
More info
 button to establish a connection. If connection cannot be established, a message with an error code will be displayed.
More info
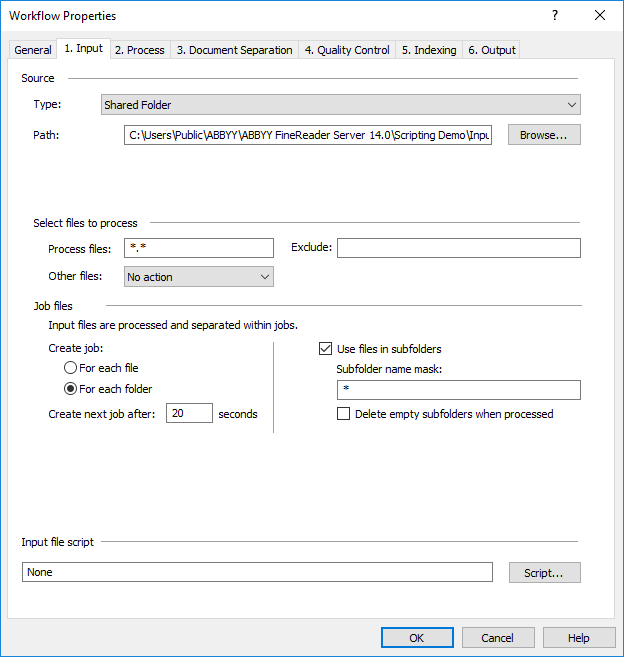
Under Create job, specify how jobs for your workflow should be created.
Select For each file if you want a new job to be created for each incoming file.
Select For each folder if you want a new job to be created for all the files found in the Input folder. Note that the job creation algorithm will vary depending on the type of your workflow:
- In the case of a Hot Folder workflow, the files in the Input folder will be placed into a job during the time period you specify in the Create next job after ___ seconds field. When this time period expires, a new job will be created, and any new files that arrive in the Input folder will be added to this new job.
 Note. Specify a small time-out (several seconds) if all the files are already in the Input folder when the workflow is started. If documents are placed into the Input folder directly from the scanner, the time-out must be longer than the pause used when scanning pages.
 - In the case of a Document Library workflow, all the files from a given folder will be placed into one job, i.e. a separate job will be created for files from each subfolder. The total number of jobs equals the number of subfolders plus one job for the files in the root folder.
 Important! If your Document Library workflow uses the same SharePoint library as both the source and the destination and the program is allowed to overwrite output files with identical names, you will only be able to create one job per file (using the For each file option).
When you select Use files in subfolders, only files from those subfolders will be processed which fit the subfolder mask specified in the field below. (This option is only available for Hot Folder and Document Library workflows.) First, the subfolder mask will be applied to the subfolders in the root folder. Any subfolders that do not fit the mask will be ignored. If a subfolder fits the mask, all of its files will be either processed or moved in accordance with the settings specified in Other files.
- Note. The program will create a separate job for files that it cannot process.
- Note. Do not rename a subfolder to make it fit your mask until all the necessary files have been copied into that subfolder. Otherwise, some files may become inaccessible.
- Note. If the source folder contains an XML ticket, a job will be created according to this XML ticket. Files that are not listed in the XML ticket, will be processed according to the workflow settings.
- Note. There can be no more than 50 jobs in a queue. When this limit is reached, no new files will be taken from the Input folder until the queue becomes smaller.
To see the current file filter, click the Process files tab. To set up a new file filter, click Edit Filter....
Script.... Clicking this button opens the Script Editor dialog box where you can enter a script for your custom image import scenario.
See also
26.03.2024 13:49:49