Dialog Box: RTF/DOC/DOCX
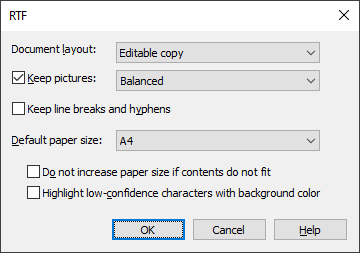
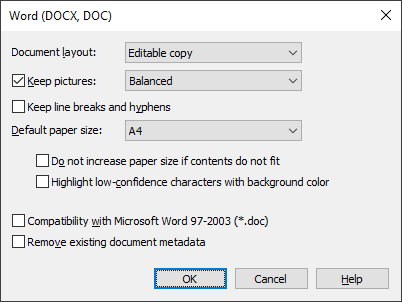
This dialog box allows you to specify RTF/DOC/DOCX format settings.


Set parameters for saving recognized text in RTF/DOC/DOCX formats and sending it to Microsoft Word:
| Option name | Option description |
| Document layout group | |
|
Document layout (drop-down list) |
Sets layout retention. The following choices are available:
|
| Keep pictures |
Select this option to keep the pictures in the recognized text. The option is selected by default.
|
| Keep line breaks and hyphens | Retains the original arrangement of text lines in the output text. |
| Default paper size group | |
|
Default paper size (drop-down list) |
Sets the paper size for saving in RTF, DOC, or DOCX format.
|
| Do not increase paper size if contents do not fit | Select this option if you do not wish the size of the page to be automatically increased to fit the recognized text. |
| Highlight low-confidence characters with background color | Select this option if you wish characters recognized with low confidence to be highlighted with a background color. |
| Compatibility with Microsoft Word 97-2003 (*.doc) | Select this option if you wish output Microsoft Word documents to be saved in DOC format. |
| Remove existing document metadata | Removes the original metadata from the document, including its title, author, all tags, etc. |
 Note. In order to display documents in Arabic correctly, Arabic must be selected as an editing language in Microsoft Office. To select it manually, open the start screen, click Microsoft Office -> Office Tools -> Office Language Preferences, and add Arabic to the list of editing languages.
See also
26.03.2024 13:49:49