- Introducing ABBYY FlexiCapture
- Installing and running the program
- ABBYY FlexiCapture architecture
-
Program settings
- ABBYY FlexiCapture Setup
- Multitenancy
- Creating a project
-
Document Definitions
- Creating fixed Document Definitions
- Creating Document Definitions for semi-structured documents
- Document Definitions without automatic fields extraction
- Document sets
-
Document Definition fields
- Text entry fields
- Checkmarks
- Checkmark groups
- Barcodes
- Pictures
- Tables
- Field group
- Service fields
- Index fields
- Link to an existing field
- Fields without a region
- Creating a field with a non-rectangular region
- Fields with several instances
- Fields with several regions
- How to change a field name
- Copying, moving, deleting fields
- Exclusion of a region from recognition
- Document Definition Wizard
- Editing and publishing a Document Definition
- Creating Document Definitions
- Document Definition properties
- Properties of a Document Definition section
- Rule validation
- Export settings
- Configuring data presentation in the document window
- Testing Document Definitions
- Localizing a Document Definition
- Classification
- Field extraction training
- Operating a configured project
-
ABBYY FlexiCapture for Invoices
- Features of ABBYY FlexiCapture for Invoices
- How to capture invoices
-
How to set up an invoice capture project
- Country and language settings
- Connecting vendor and business unit databases
- Data export settings
- The status of documents in ABBYY FlexiCapture for Invoices projects
- Training ABBYY FlexiCapture for Invoices
- Rules
- Capturing additional invoice fields
- Purchase Order Matching
- Enabling additional program features for operators
- Using multiple Document Definitions
- Editing invoice processing settings in XML files
- Updating the Document Definition for invoices
- Tax systems
- Specifications
- Capturing receipts
- Capturing purchase orders
- Using NLP to process unstructured documents
- ABBYY FlexiCapture interface
-
Appendix
-
Using scripts in ABBYY FlexiCapture
- Specifics of scripts written in .Net languages
- External assemblies
- Object model
-
Scripts for customizing processing stages
-
Types of scripts
- Script rule
- Autocorrection script
- Export script
- User script (custom action)
- Document assembly script
- Custom recognition script
- Stage rule
- Processing scripts
- Data set update script
- Data set validation scripts
- Document classification script
-
Event handlers
- Batch created
- Batch deleted
- Batch parameter change
- Batch structure change (page added/page deleted/document added/document deleted)
- Pages moved
- Batch opened/closed
- Batch integrity check
- Document parameter changed
- Document state changed
- Export completed
- Script that is run after rule checks
- Before matching
- Field verification request
-
Objects
- IActionResult
- IAssemblingError
- IAssemblingErrors
- IBatch
- IBatchCheckResults
- IBatchItem
- IBatchItems
- IBatchTypeClassifier
- IBatchTypeClassifierResult
- IBinarizationParams
- IBoxedBoolean
- ICharacterParams
- ICharactersParams
- ICheckmarkGroupValue
- ICheckmarkValue
- IDataSet
- IDataSetQuery
- IDataSetRecord
- IDocument
- IDocuments
- IDocumentExportResults
- IDocumentsExportResults
- IDocumentDefinitionInfo
- IDocumentDefinitionInfoArray
- IEditablePictureObject
- IExportFieldsToRedact
- IExportImageSavingOptions
- IField
- IFieldRegion
- IFieldRegions
- IFields
- IFlexiCaptureTools
- ILocalContrastParams
- IMatchedSectionInfo
- IMatchingInfo
- IPage
- IPageClassificationResult
- IPages
- IPictureObject
- IPictureObjectsInfo
- IPrincipal
- IPrincipals
- IProcessingCallback
- IProject
- IProperties
- IProperty
- IPropertyModificationInfo
- IRecordCheckResult
- IRecordset
- IRect
- IRects
- IRoutingRuleResult
- IRuleContext
- IRuleError
- IRuleErrors
- IRuleTag
- IRuleTags
- IScriptBinaryAttributes
- IScriptDefinitionContext
- ISectionDefinitionInfo
- ISectionDefinitionInfoArray
- IShadowsHighlightsParams
- IStageInfo
- IUserAttachment
- IUserAttachments
- IUserSessionInfo
- IValue
- IVARIANTArray
- TAssemlingErrorType
- TBatchItemType
- TColorToFilter
- TExportFieldType
- TExportType
- TImageCompressionType
- TPageClassificationType
- TPdfAVersion
- TPdfDocumentInfoType
- TPdfTextSearchAreaType
- TPrincipalType
- TProcessingPriority
- TPropertyType
- TRuleErrorType
- TStateType
- Sample scripts
- Internal names of recognition languages
-
Types of scripts
-
Scripts for processing interface events
-
Event handlers
- On Document Closed
- On Project Closed
- On Activate Document
- On Field Control Activate
- On Return From Task
- On User Command
- On Field Control Deactivate
- On Closing Document
- On Task Close
- On Closing Project
- On Region Change
- On Task Window Mode Changed
- On Open Document
- On Task Window Create
- On Task Reject
- On Region Control Draw
- On Task Send To Stage
- On Text Field Validating
-
Objects
- IBoolean
- IBoxedFieldControl
- IDocumentEditor
- IDocumentItem
- IDocumentItems
- IDocumentsCollection
- IDocumentsWindow
- IDrawContext
- IErrorControl
- IErrorControls
- IErrorsWindow
- IFieldControl
- IFieldRegionControl
- IFieldRegionControls
- IFormWindow
- IImageWindow
- IMainMenu
- IMainWindow
- IMenu
- IMenuItem
- IPageControl
- IPageItem
- IPageItems
- IPagesCollection
- IPoint
- ISelection
- IShellRational
- IShellRect
- IShellRects
- ITaskWindow
- ITextEditor
- IToolbar
- IToolbarButton
- IToolbars
- TCommandBarType
- TCommandID
- TDockingType
- TDocumentState
- TErrorType
- TSelectionType
- TTaskWindowMode
- TTextSize
- TUserRole
- TWorkWindowType
-
Event handlers
- User scripts for the Web Verification Station
- Creating a machine-readable form
- Hot keys
- Additional options
- Description of Processing Server commands
- ABBYY FlexiCapture sample projects
- Supported recognition languages
- Supported classifier languages
- Fonts for correct characters rendering
- Supported text types
- Supported barcode types
- Supported input formats
- Processing PDF files
- Export file formats
- Date formats
- Alphabet used in regular expressions
- Patents
- Third-party technologies
- Glossary
- Technical support
- How to buy ABBYY FlexiCapture
- End-User License Agreement (EULA)
-
Using scripts in ABBYY FlexiCapture
Configuring how data is displayed in the document window
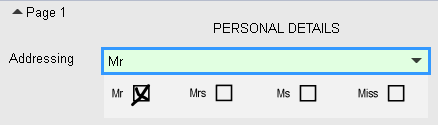
After the data has been recognized, the user will see it in the document window. By default, the data will be arranged sequentially, with captions corresponding to the names of the Document Definition fields. However, the station administrator can change how the data is displayed, rearranging it or renaming elements. This is done by modifying the data form in the Document Definition editor.
To customize the display of data:
- Open the Document Definition editor.
- Click View → Data Form or press Alt+F2 to display the data form.
- Use shortcut menu commands to customize the data form.
For details, see "Data form settings" below.
To restore the default data form view settings, click Restore Default View on the shortcut menu. Any user-made changes will be lost.
Properties of data form elements
Each type of data form element has its own set of properties. Below is a list of properties that are common to all types of elements, properties of groups and properties of label boxes.
To view the properties of an element, double-click it or right-click it and click Properties on its shortcut menu.
Position tab of the Properties dialog box of an element
- Alignment - lets you adjust an element's alignment along the vertical an horizontal axes. You can also use the shortcut menus of elements to change their alignment.
- Margins - changes the distance, in points, between an element and the edges of its cell. If you specify a margin of zero, the program will use the smallest margin that still prevents the elements from overlapping.
You can also change the margins using the commands on the element's shortcut menu, by dragging the element inside its cell, and by moving the right or bottom edges of the cell so that they touch the element. - Set min size - specifies the minimum width and height of an element. If no minimum size is specified, the size will be determined automatically.
You can also change the minimum width and height of an element by dragging the edges of the element with the mouse. To restore the element's default size, right-click it and click Restore default size on the shortcut menu.
Elements for which the minimum size has been calculated automatically will be highlighted in green on the data form. Elements whose minimum size has been specified by the user will be highlighted in red. - Fixed width - indicates that the element has a fixed width. This setting will only work if the size of the field is large enough to contain at least one character.
If a very long string of text is to be entered into a field whose width is not fixed, the field will expand accordingly to fit the length of the text. When you specify a fixed width for a field, long text strings will be wrapped to the field size.
Format tab of the Label Box Properties dialog box of a label:
- Text - the text in the label (usually the name of a field or an explanation).
- Font... changes the font, size and font style. The font and font size specified in the Document Definition are used by default. To change these settings, disable the Use default option.
Tip. You can change the label of a field in the data form without changing the name of the field in the document structure. This can be useful if you are working with a Document Definition where you cannot change names of fields, or when you need to specify custom names for columns in tables.
Tip. You can add text such as explanations for fields to the document by right-clicking free space in the data form and clicking Insert Text on the shortcut menu.
Format and Instances tabs in group properties:
- Display settings for groups of fields
You can change the default appearance of groups of fields in the document window. To do this, right-click a group in the data form, open its properties dialog box, select the Format tab and select one of the following items from the Collapse group drop-down list: - Never - the group is expanded and all fields in the group are visible to the Operator during verification. This value is used by default.
- Always - the group is collapsed. The Operator will have to expand the group to view the contents of its fields.
- If there are no field errors - the group is collapsed if the fields it contains have no format errors. Format errors that occurred after the document has been opened will not affect how the group is displayed.
- If all fields are empty - the group will be collapsed if its fields contain no data.
- Show border shows/hides the border around the group in the document window.
If a group contains instances and its border is hidden, rectangular control elements will appear to the left of the instances. These control elements can be used to delete the instance and add a new instance one position above or below the selected instance. - Show 'Add new instance' prompt shows/hides a link prompting the user to add an instance for groups or fields with instances.
The element properties described above, the screen resolution, the zoom level of the form and the contents of cells are used to calculate the position of fields on the data form.
Data form settings
Font and font size
By default, recognized text is set to 10pt Arial font. You can change the default settings in the properties dialog box of the Document Definition (click Document Definition → Document Definition Properties... and select the Data Form tab).
- Field data - this group contains font settings for recognized text.
- Field label - this group contains font settings for explanatory text and field labels.
Displaying images of fields in the document window
You can choose to display an image of Text, Barcode, Checkmark and Group of checkmarks fields below recognized data in the document window.
To display an image of a field in the document window, right-click the field in the data form and select Add Field Picture from the shortcut menu.
When processing completes, data extracted from the field will be displayed in the document window and an image of the field will be displayed beneath this data.
Grouping elements
Multiple elements can be combined into a group, and this group can be placed on the data form. You can use commands from the shortcut menu to align the group and specify margins (delete or reset default values). You can also delete or lock the group. Elements of a locked group cannot be moved.
To put elements in a group, select them by clicking them while holding the Ctrl key, right-click one of them and click Group Selected on the shortcut menu. To remove elements from a group, use the mouse to drag them outside of the group.
Note: When a label or an image is added to a field, these elements will be grouped.
Column display settings
Table columns that were not detected during recognition can be hidden. You can specify which columns to hide:
- In the data form. Open the table's properties and select the columns you want to hide in the Select columns to hide when empty list on the Format tab.
Note: You can use the Move Up and Move Down buttons to the right of the list to change the order of columns in the recognized document. This feature is not available on web stations.
- In the document window. Right-click the table's title and select the names of the columns you want to hide in the shortcut menu.
Display Settings for Document Definition sections
When working with document sets or multi-section Document Definitions, you may want to hide specific sections on the data form. To do this, open the properties dialog box of the section you want to hide and disable the Show on verification option on the General tab.
Selection order of fields
The default verification order in the document window is from top to bottom, from left to right. The order in which fields are selected when the user presses Tab, F4 or F8 can be changed.
To do this, click Tab Order... on the shortcut menu of the data form. In the dialog box that opens, select the Custom option and use the buttons in the right part of the dialog box to change the order.
- To Beginning moves the selected field to the top of the list or places a group element in the first position in the group.
- Up moves a field one position higher.
- Down moves a field one position higher.
- To End moves a field to the bottom of the list or places a group element in the last position in the group.
- Auto Arrange changes the order of fields in the list to match their order in the document structure.
Note: This feature is not available in web stations.
Zooming the document image
During verification, you can zoom the document image with the mouse or by using shortcut menu commands.
Double-clicking different parts of the document image changes the zoom level:
- Double-click a field on the image to zoom the image to 100%. The field will be highlighted in yellow. Double-clicking the field again will return the previous zoom level.
- Double-click a field in the recognized data area to zoom the image to 200%. The image will be centered on the field and the field will be highlighted in yellow.
- Double-click an empty spot on the page to change the zoom level so that the entire page fits in the image area. Double-clicking again will change the zoom level to 100% and center the view on the area you double-clicked.
- Double-click an empty space in the image area to zoom the image to 25%.
Tip. You can also zoom in and out by scrolling the mouse wheel while holding the Ctrl key.
You can change the horizontal or vertical order of pages by right-clicking the title of the Document window and clicking Arrange Pages Vertically on the shortcut menu.
02.03.2021 8:10:42