English (English)
Connecting to ServiceNow as a Data Source
| The page is out of date. We will update the content soon. Should you have any questions regarding connecting to ServiceNow, please submit a request to the ABBYY technical support service on this page. |
Steps to Connect ABBYY Timeline To ServiceNow Instance
- Login to your ServiceNow account.
- Type oauth in the search box to easily find the Application Registry.
- Navigate to Application Registry.
- Click New to create a new Application.
- Choose Create an OAuth API endpoint for external clients from the list.
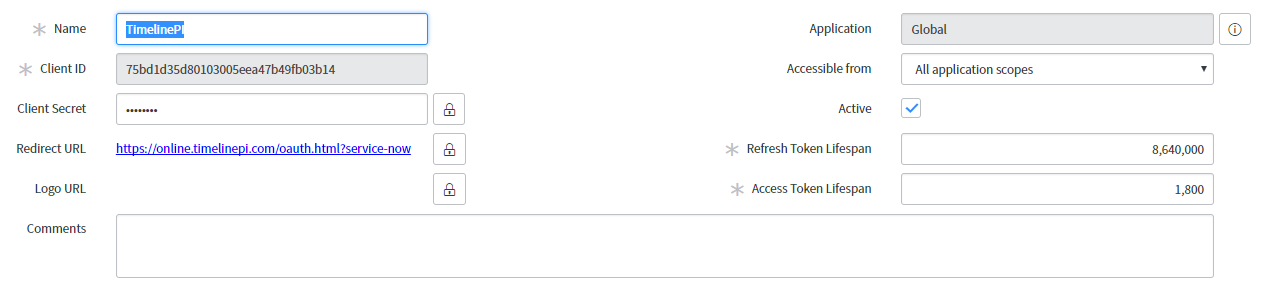
- Enter a name – the name does not matter, type any name (eg. TimelinePI).
- Click the lock button near the Redirect URL to specify the Redirect URL.
- Enter the URL: https://online.timelinepi.com/oauth.html?service-now
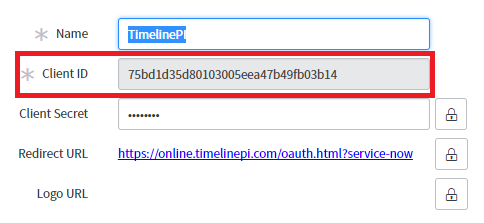
- Copy Client ID field for use on ABBYY Timeline.
- Save the changes by clicking Submit.
ABBYY Timeline Login Details
Ensure that your browser allows pop-ups from https://Online.TimelinePI.com
Instance Name – comes from the SN instance name which can be found in the SN URL: https://instancename.service-now.com/
Client ID – comes from the newly created Application registry screen
User Name/Password – a valid admin login for the ServiceNow Instance.
9/22/2023 8:59:47 AM