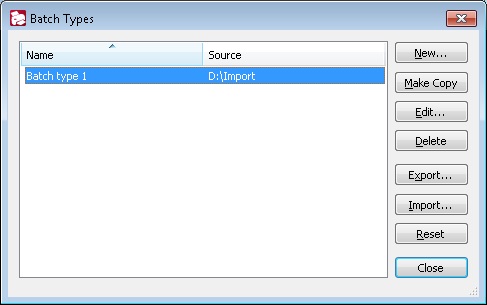
Batch Types Dialog Box
In this dialog box, you can manage batch types: create, copy, edit, remove, export, and import batches. To open this dialog box, select Tools → Batch Types....

The list displays the names of the batch types and the scanner source used by them. Use the buttons to the right of the list to manage the batch types.
| Option | Description |
| New... | Starts the Batch Type Wizard, where you can create a new batch type. |
| Copy | Copies the selected batch type. |
| Edit... | Edits the selected batch type. |
| Delete | Deletes the selected batch type. |
| Export... |
Opens the Export Batch Types dialog box where you can specify the export options for batch types. Select the batch types you wish to export (Export all batch types or Export selected batch types). You can prohibit changes to batch types by selecting Prohibit editing batch types and entering a password. In this event, whenever these batch types are imported or edited, the program will ask the user to enter a valid password. Click OK and, in the Select Storage for Batch Types dialog box, select a folder to store the XML-file with batch types description. |
| Import... |
Imports batch types from an XML file. In the Select Storage for Batch Types dialog box that opens provide the path to the XML file that contains the description of the batch types.
|
| Close | Closes the dialog box. |
4/12/2024 6:16:02 PM
 Important! When importing batch types, all the existing batch types are deleted.
 Note. When passing a batch type that contains external .Net assemblies, be sure to pass not only the XML file with the batch type descriptions, but also the .spr folder, which contains the external assembly files (*.asr). When loading a batch type from the server, the .spr folder is imported automatically.