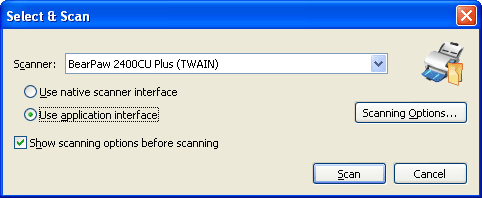
In this dialog box, you can select a scanner source, i.e. a hardware or a virtual scanner. The appearance of the dialog box changes depending on which scanner source is selected. This dialog box is displayed if you set up the program to display the scanner source selection dialog box whenever scanning starts. Click the arrow to the left of the Scan button on the toolbar and select the Select and Scan... option.
From the Scanner drop-down list, select one of the available scanners and make the necessary settings.
For a hardware scanner...
| Option |
Description |
| Use native scanner interface |
Select this option to use the interface provided by the scanner.
 Note. If native scanner interface is used the Show scanning options before scanning option should also be selected. Otherwise, if scanning settings were not originally specified in the scanner interface, a scanning error will occur. Note. If native scanner interface is used the Show scanning options before scanning option should also be selected. Otherwise, if scanning settings were not originally specified in the scanner interface, a scanning error will occur.
|
| Use application interface |
Select this option to use the interface provided by the application. |
| Scanning Options... |
Opens the scanner settings dialog box. If you select the scanner's interface, you will see the dialog box provided by the driver of your scanner. If you select the application's interface, you will see the scanner settings dialog box provided by the application. |
| Show scanning options before scanning |
If this option is selected, the program will display the scanner settings dialog box each time scanning starts. |
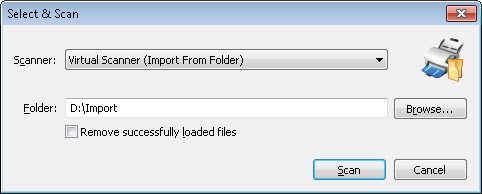
For a virtual scanner...
| Option |
Description |
| Folder |
Specify the path to the folder from which images are to be imported (you can click Browse... to browse to the desired folder). |
| Browse... |
Click this button to locate a folder with images. |
| Remove successfully loaded files |
Select this option if the images are to be removed from their source folder after they are loaded. |
Click Scan to start scanning. Click Cancel to quit this dialog box.