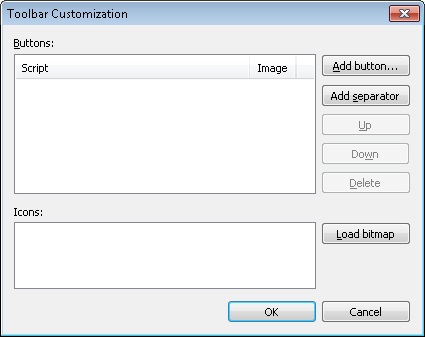
Toolbar Customization Dialog Box
This dialog box allows you to customize the Scripts toolbar for individual batches or for a certain batch type. To customize the toolbar for individual batches, click the Customize Toolbar... button on the Scripts tab of the Tools → Options... dialog box. For a certain batch type, you can customize the Scripts toolbar when creating the batch type with the Batch Type Wizard or adjust it in the Batch Type Properties dialog box. For this, click the Customize Toolbar... button on the Scripts tab.
The Toolbar Customization dialog box will open.

The window displays the names of the scripts and icons associated with them.
- To add a button that will run a selected script, click Add Button... and select the script from a drop-down list of scripts available for a current batch type.
- To add a separator between the two buttons on the Scripts toolbar, select a button after which you want to add a separator and click the Add Separator button.
- Use Up and Down buttons to move a selected button one position up and down respectively.
- You can remove a button by clicking Delete.
- The Load Bitmap button allows you to add icons for the script buttons.
 Note. It is possible to load only one *.bmp file for all icons. To add icons for more than one button, you must load a bitmap that contains all necessary pictures. Dimensions of the *.bmp file must be equal to 24*x24 pixels. The loaded bitmap will be split automatically. To replace the button with an icon, click on the script name first and then on a desired icon. The icon will appear next to the script name.
3/26/2024 1:49:49 PM