Getting Started
Ready to deploy? The instruction below walks you through deploying ABBYY Timeline system, step-by-step.
Step 1. Make sure your computers are ready for ABBYY Timeline system
Before you begin installing ABBYY Timeline system:
- Check the system requirements.
These requirements help you know whether your computers support ABBYY Timeline components. - Apply the latest Windows and other programs updates.
These updates ensure that your computer has the latest security updates. - Reboot.
The reboot ensures that any pending installs or updates don't hinder the ABBYY Timeline components install. - Free up space.
Remove unneeded files and applications from your %SystemDrive%, as well as discs that you intend to use, for example, to store the Timeline or Recording Service databases. - If you intend to configure HTTPS, please visit the 'Using HTTPS' section.
Step 2. Install ABBYY Recording Service
If you are not going to use the Task Mining feature, skip this step.
- Run the ABBYY.RecordingService.5.3.*.exe file and follow the on-screen instructions in the Installation Wizard.
If you receive a User Account Control notice, choose Yes. - Specify the necessary network settings.
- Make sure the Recording Service has been installed correctly by performing a health check on Recording Service.
Please refer to the 'Installing Recording Service' section for guidelines.
Step 3. Install ABBYY Timeline
If you are going to use Timeline in the cloud, please, skip this step.
Important. Recording Service and Timeline components must be installed on separate computers.
- Run the ABBYY-Timeline-5.3.*-installer.exe file and follow the on-screen instructions in the Installation Wizard.
If you receive a User Account Control notice, choose Yes. - Specify the necessary network settings.
- Make sure the Timeline has been installed correctly by performing a health check on Timeline.
Please refer to the 'Installing ABBYY Timeline' section for guidelines.
Step 4. Establish the trust relationship between ABBYY Recording Service and ABBYY Timeline
If you are not going to use the Task Mining feature, skip this step.
For interaction between Recording Service and Timeline, OAuth must be configured.
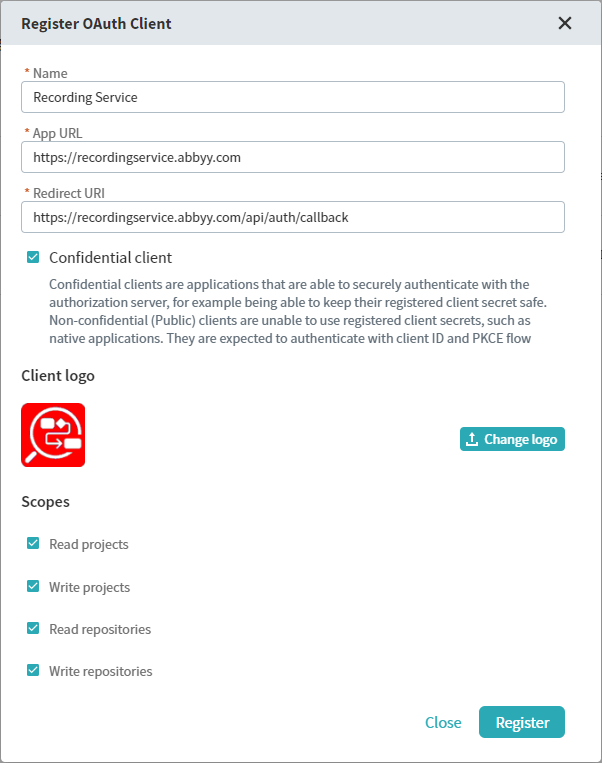
- Register Recording Service as a client on the Timeline website and obtain credentials (Client ID and Client Secret).
Please refer to the 'Registering a New Client on ABBYY Timeline website' section for guidelines.
- In the Recording Service website specify the Timeline authentication details using the credentials you obtained in step 1.
Please refer to the 'Configuring connection setting in Recording Service' section for guidelines.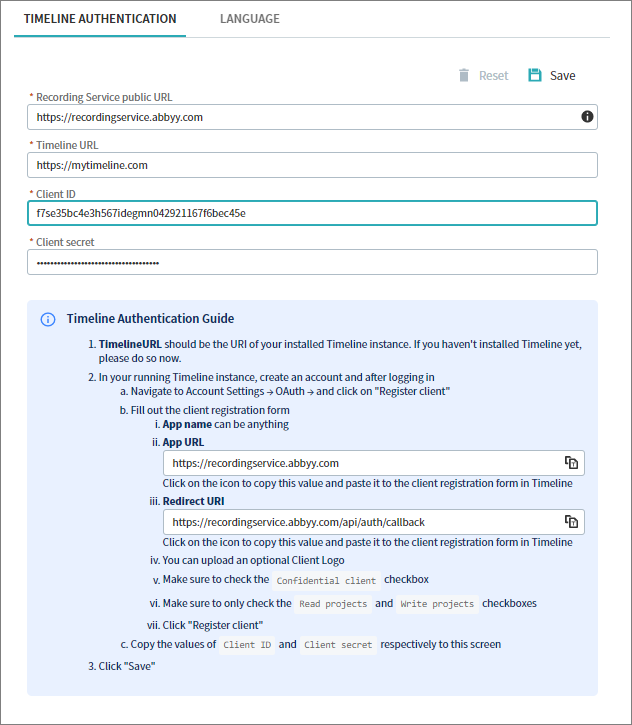

Step 5. Install ABBYY Recorder on users' computers
If you are not going to use the Task Mining feature, skip this step.
Important. The user workstations installing the Recorder, and the server hosting the Recording Service must all be members of the same Active Directory domain.
If you plan to record user activities who work using Windows RemoteApp and Citrix Workspace App, install the Recorder on a terminal server.
ABBYY Recorder can be installed on the terminal server as if it was a workstation. It will log the actions of users connecting to this server via a Citrix client or RDP.
- Install the Recorder on the users' workstations using the method of your choice.
Please refer to the 'Installing Recorder' section for guidelines. - Turn on Recorder extensions on the workstations.
Please refer to the 'How to Turn Recorder Chrome Extension on' section for guidelines.
Now you have all the ABBYY Timeline system components installed, and you can start working with it.
Step 6. Start working with Task Mining
After ABBYY Timeline system installation is complete, it must be configured.
- Open the Recording Service website and configure settings.
- Go to Settings > Timeline authentication and make sure the connection to Timeline is established.
Please refer to the 'Administering' >'Using OAuth to Access Timeline' > 'Configuring connection setting in Recording Service' section for guidelines. - Go to Templates and click Default in the Template name column. Review and modify the options if needed.
In the template, you can specify what data to register and how to process it. Please refer to the 'How to Configure and Apply Template' section for guidelines. - Go to Recorders.
You will see the list of connected recorders that were installed in Server managed mode. Installed in this mode, recorders are automatically added to the Recorders list. - Select a recorder and click Start.
This starts recording all user's desktop events to log. - Go to Logs
All recorded events are collected into logs and available in the Logs tab.
Note. The logs may take some time to process. We recommend you wait a while before starting to work with the logs. - Submit logs from Recording Service to Timeline
To upload logs to Timeline, perform the following steps: - Select logs and click Load to project.
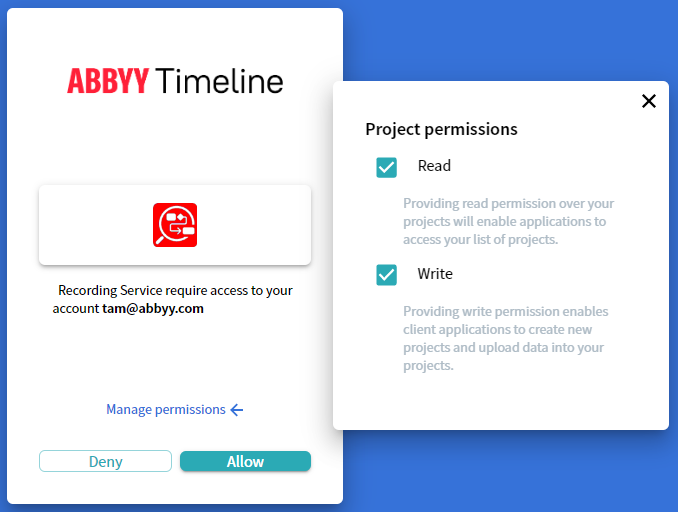
Recording Service will redirect you to the Timeline authentication page. - Enter your Timeline credentials (i.e. credentials specified during the Timeline installation process) and click Allow in the access permission window.
This will enable Recording Service to upload logs into your account projects.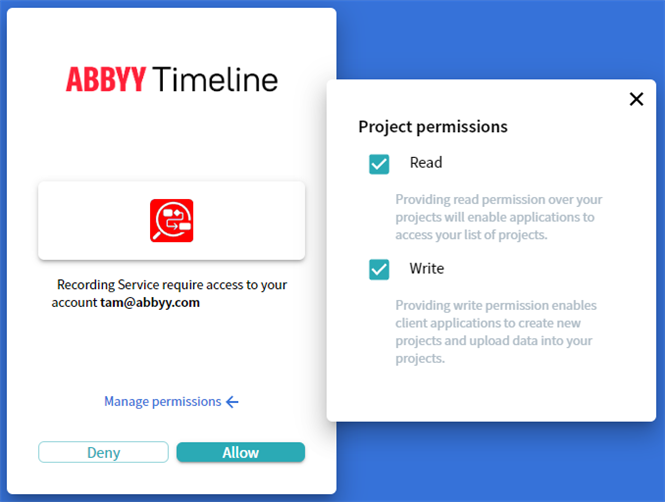
- In the opened Project list windows go to Create project, enter the name for your new Task Mining project and click Create to upload logs.
- All selected logs will be queued for upload.
Information about the upload process is displayed in the message box. You can abort the upload by clicking Cancel in the message box.
Note. It is impossible to cancel the upload of logs that have already been submitted to Timeline by the moment of cancellation. Such logs will be available for work on the Timeline website. - After successful log import click on
 and then on the project name to open this project in Timeline.
 - Uploaded logs are available for cutting and transforming in the opened project.
9/22/2023 8:59:47 AM