Checking recognized text
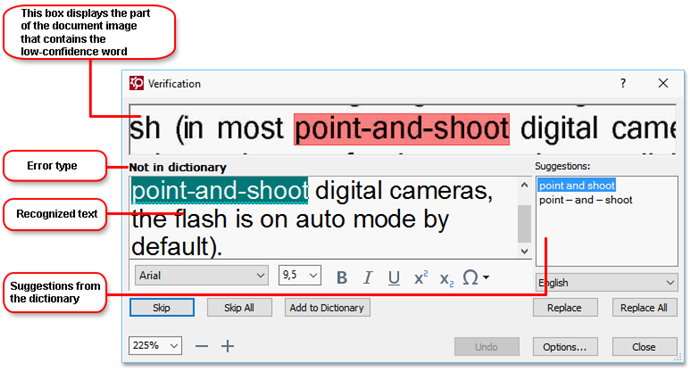
You can edit recognized text either directly in the Text pane or in the Verification dialog box (click Recognize > Verify Text... to open this dialog box). In the Verification dialog box, you can review low-confidence words, correct spelling errors, and add new words to the user dictionary.
Checking texts in the Text pane
You can check, edit, and format OCR results in the Text pane.
The toolbar of the Text pane contains buttons that let you check the spelling in recognized texts. Use the  /
/ buttons to go to the next/previous low-confidence word or character. If the low-confidence characters are not highlighted, click the
  button on the toolbar at the top of the Text window.
To verify a low-confidence word in the Text pane:
- Click the word in the Text pane. The image area with this word will be highlighted in the Image pane. At the same time, the Zoom pane will display a magnified image of the word.
- Correct the word in the Text window, if necessary.
Tip. You can insert symbols that are not on available on your keyboard by clicking the  button. Alternatively, use the Verification dialog box.
This method is convenient when you need to compare the source and output documents.
The text formatting tools can be found:
- on the toolbar at the top of the Text pane

- in the Text Properties pane (right-click anywhere in the Text pane and then click Properties on the shortcut menu to display this pane)
 Use the
  /
/ buttons to move around the Text Properties pane if the Text window is too narrow and you cannot see the entire pane.
 To learn how you can change the appearance of the main window and the tools available on its toolbars, see OCR Editor Window and Toolbars.
Checking the recognized text in the Verification dialog box
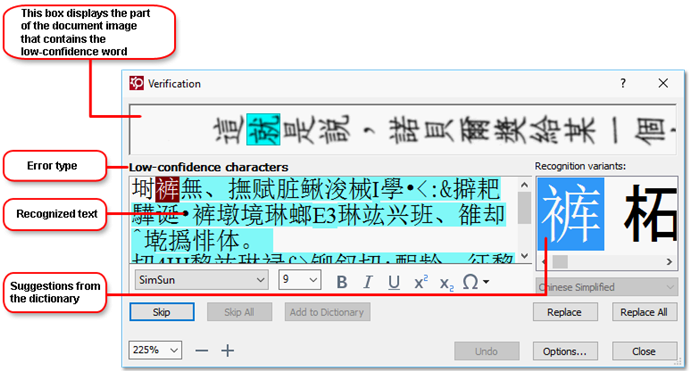
Verification Station offers a Verification dialog box, where you can check and correct words that contain low-confidence characters. To open the Verification dialog box, click  on the main toolbar or click Recognize > Verify Text....

In the Verification dialog box, you can:
- Skip a highlighted word without making any changes. When you click Skip, the highlighting is removed.
Replace the highlighted word with one of the suggested variants. - Simply select the correct suggestion in the box to the right and click Replace.
- Add the highlighted word to the dictionary by clicking the Add to Dictionary button.
Next time the program encounters this word, it will no longer treat it as an error. See also: Working with user dictionaries.
 - Change the font and apply font effects.
- Insert non-keyboard characters into the text. Click the
 and select More Symbols.... In the dialog box that opens, from the Subset drop-down list, select the subset that contains the symbol that you need (e.g. Basic Greek or Currency Symbols). Next, double-click the character that you wish to insert. Alternatively, you can specify the Unicode code point of the character in the Character code field.
Tip. To change the checking options, click Options....
When checking texts written in Chinese, Japanese or Korean, the program will suggest similar-looking characters for characters recognized with low confidence.

Working with user dictionaries
When recognizing a text, Verification Station checks recognized words against its dictionaries. If your text contains too many specialized terms, abbreviations or proper names, you can improve OCR quality by adding them to a user dictionary.
 User dictionaries may not be available for some of the supported languages.
To add a word to the user dictionary, do one of the following:
- In the Verification dialog box (click Recognize > Verify Text... to open this dialog box), click the Add to Dictionary button, or
- In the Text window, right-click the word you wish to add and then click Add to Dictionary on the shortcut menu
 When adding a word to a user dictionary, make sure that the right language is selected.
26.03.2024 13:49:49